Hmm, sadly we did not find anything. Just retry with a different search.
Play "Music" with stepper motors Part 1
Grumpy Developer Reading time:about 4 min Date: Language:english
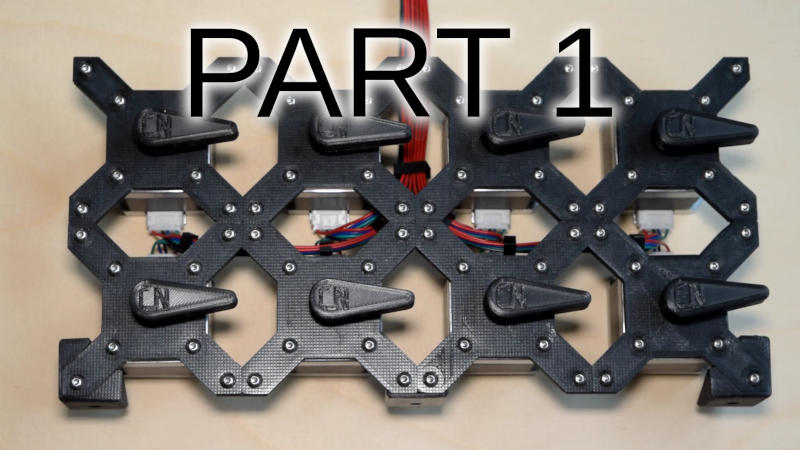
Have you ever dreamed of creating an instrument that combines art and technology? I recently set out to build a motion control project that plays music using stepper motors, and what started as a crazy idea turned into a fascinating journey.
In a world where others had already explored this concept, I found myself without any guides or tutorials. But I'm a DIY enthusiast who loves challenges, so I decided to create my own version from scratch. The result is a system that can play music using midi commands sent through a USB serial interface, and it's all powered by an Arduino microcontroller.
In this project, you'll learn how to bring your creative ideas to life with motion control, and how to create a fully functional music player using stepper motors. From the hardware plans to the software instructions, I'm sharing my entire process so you can replicate it and start creating your own unique soundscapes.
CIMDIT: Now with MIDI support
Grumpy Developer Reading time:about 2 min Date: Language:english
Get ready to unlock the full potential of your Completely Insane Multi-Device Input (CIMDIT)! The latest update brings partial MIDI support, allowing you to control other instruments and software on your computer via MIDI routing. Imagine being able to play a synth with CIMDIT while also sending notes to your favorite DAW or controlling effects pedals - the possibilities are endless!
But what exactly is MIDI? In short, it's a protocol that lets electronic musical instruments, computers, and audio devices talk to each other in music-making harmony. With CIMDIT now supporting MIDI, you can take your music production to new heights.
Want to know more about what you can do with this powerful feature? You'll be able to send control messages like panning and modulation wheel adjustments, as well as create custom macros using pitch bend and more. Plus, our included profile generation page gives you a head start with some example configurations for all supported MIDI messages. Ready to unleash your creativity? Dive in to learn more about the full potential of CIMDIT's MIDI capabilities!
Play "Music" with stepper motors Part 3
Grumpy Developer Reading time:about 8 min Date: Language:english
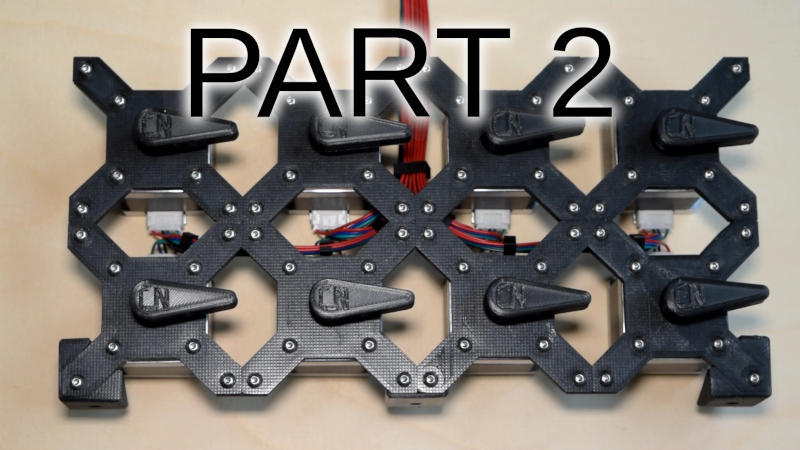
In this third installment of the mini series, we're diving into the nitty-gritty details of controlling multiple stepper motors with precise timing and frequency accuracy. The key to achieving this lies in understanding how to efficiently handle interrupts, utilize internal timers, and minimize clock cycles.
The author breaks down the implementation into manageable chunks, starting with the initialization process, where they configure the output pins and set up the interrupt system. The use of a 48000 Hz timer call results in an extremely accurate representation of the desired frequency range, thanks to the internal pre-scaler.
However, it's the main interrupt function that showcases the real complexity of this project. Here, we see how the author employs local copies of port pins to speed up operations and mitigate potential race conditions. They also utilize a clever trick to reduce instruction cycles by using a register instead of accessing RAM.
The final piece of the puzzle is the `setChannel` function, which allows users to adjust the frequency and enable/disable specific channels. This function cleverly incorporates a formula that calculates the new counter value based on the desired frequency, ensuring smooth transitions between states.
With this code, you'll be able to experiment with various configurations, including reducing maximum frequencies and expanding the system to accommodate more stepper motors. If you're interested in exploring further possibilities, feel free to reach out to the author for more information.
Play "Music" with stepper motors Part 2
Grumpy Developer Reading time:about 6 min Date: Language:english
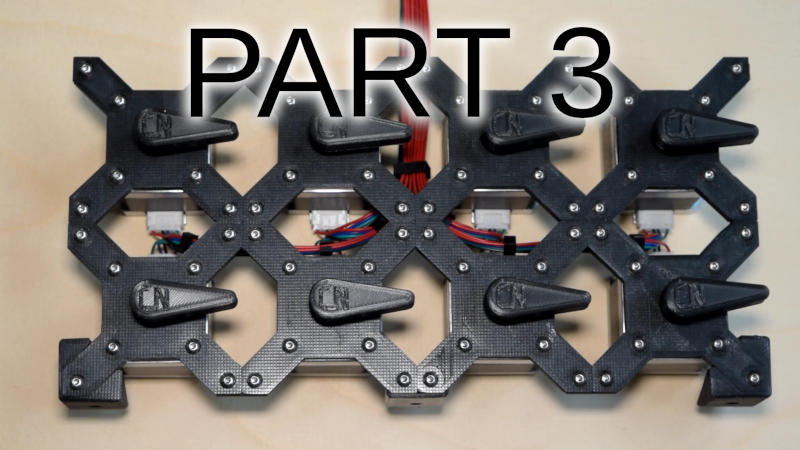
In my previous post, I showed you how to control a "Music" play using stepper motors with Arduino and MIDI protocol. This time, I'll be focusing on the software side of things, specifically the code that brings it all together.
The midi2stepper.ino file is where the magic happens. It reads incoming MIDI messages from the serial port and decodes them into frequencies to be played by our stepper motors. The algorithm used is quite clever, as it assigns each note to a free stepper motor, rather than just playing one specific motor for all notes.
One of the most interesting parts of this code is how it handles note-off events. Instead of simply turning off the volume, it finds an active channel with that frequency and turns it off. This allows for more precise control over which motors are being used.
Of course, there's still more to explore in this software - particularly in the midi2stepper.cpp/.h files, where things get a bit hairy (as I like to call it). But for now, let's just say that we've covered the basics of how MIDI messages are interpreted and turned into stepper motor movements.
Want to see more? Head on over to the next post in this series, where we'll dive deeper into the code and explore some of its intricacies.