
Introduction to "CIMDIT" the "completely insane multi device input thingy"
Yeah, I need to work on the naming of things...
What is CIMDIT
As the acronym implies, it is an input device for multiple input things.
Or to be more precise, it is an input device with modules that can be installed and those inputs can be mapped to multiple joysticks, a mouse or a keyboard or can be used as a MIDI source.
I was looking for a macro keyboard "for a friend" that does video editing. There are commercial ones and open source ones around.
I also have an old joystick that starts to break down.
And finally I'm looking for a 3D-Mouse for my CAD stuff I do from time to time.
Update from July, 22nd 2022: Now it is even more insane, it can send MIDI and can be used to create music (with extra sound generating hardware or software). The real kind, not the stepper "motor music" :)
So why build 3 4 things, lets do one monster.
Disclaimer, at the time of writing, it is not built yet, just single functionalities are tested.
It is fully working and in use and still 690 bytes of program memory left, so more space for madness.
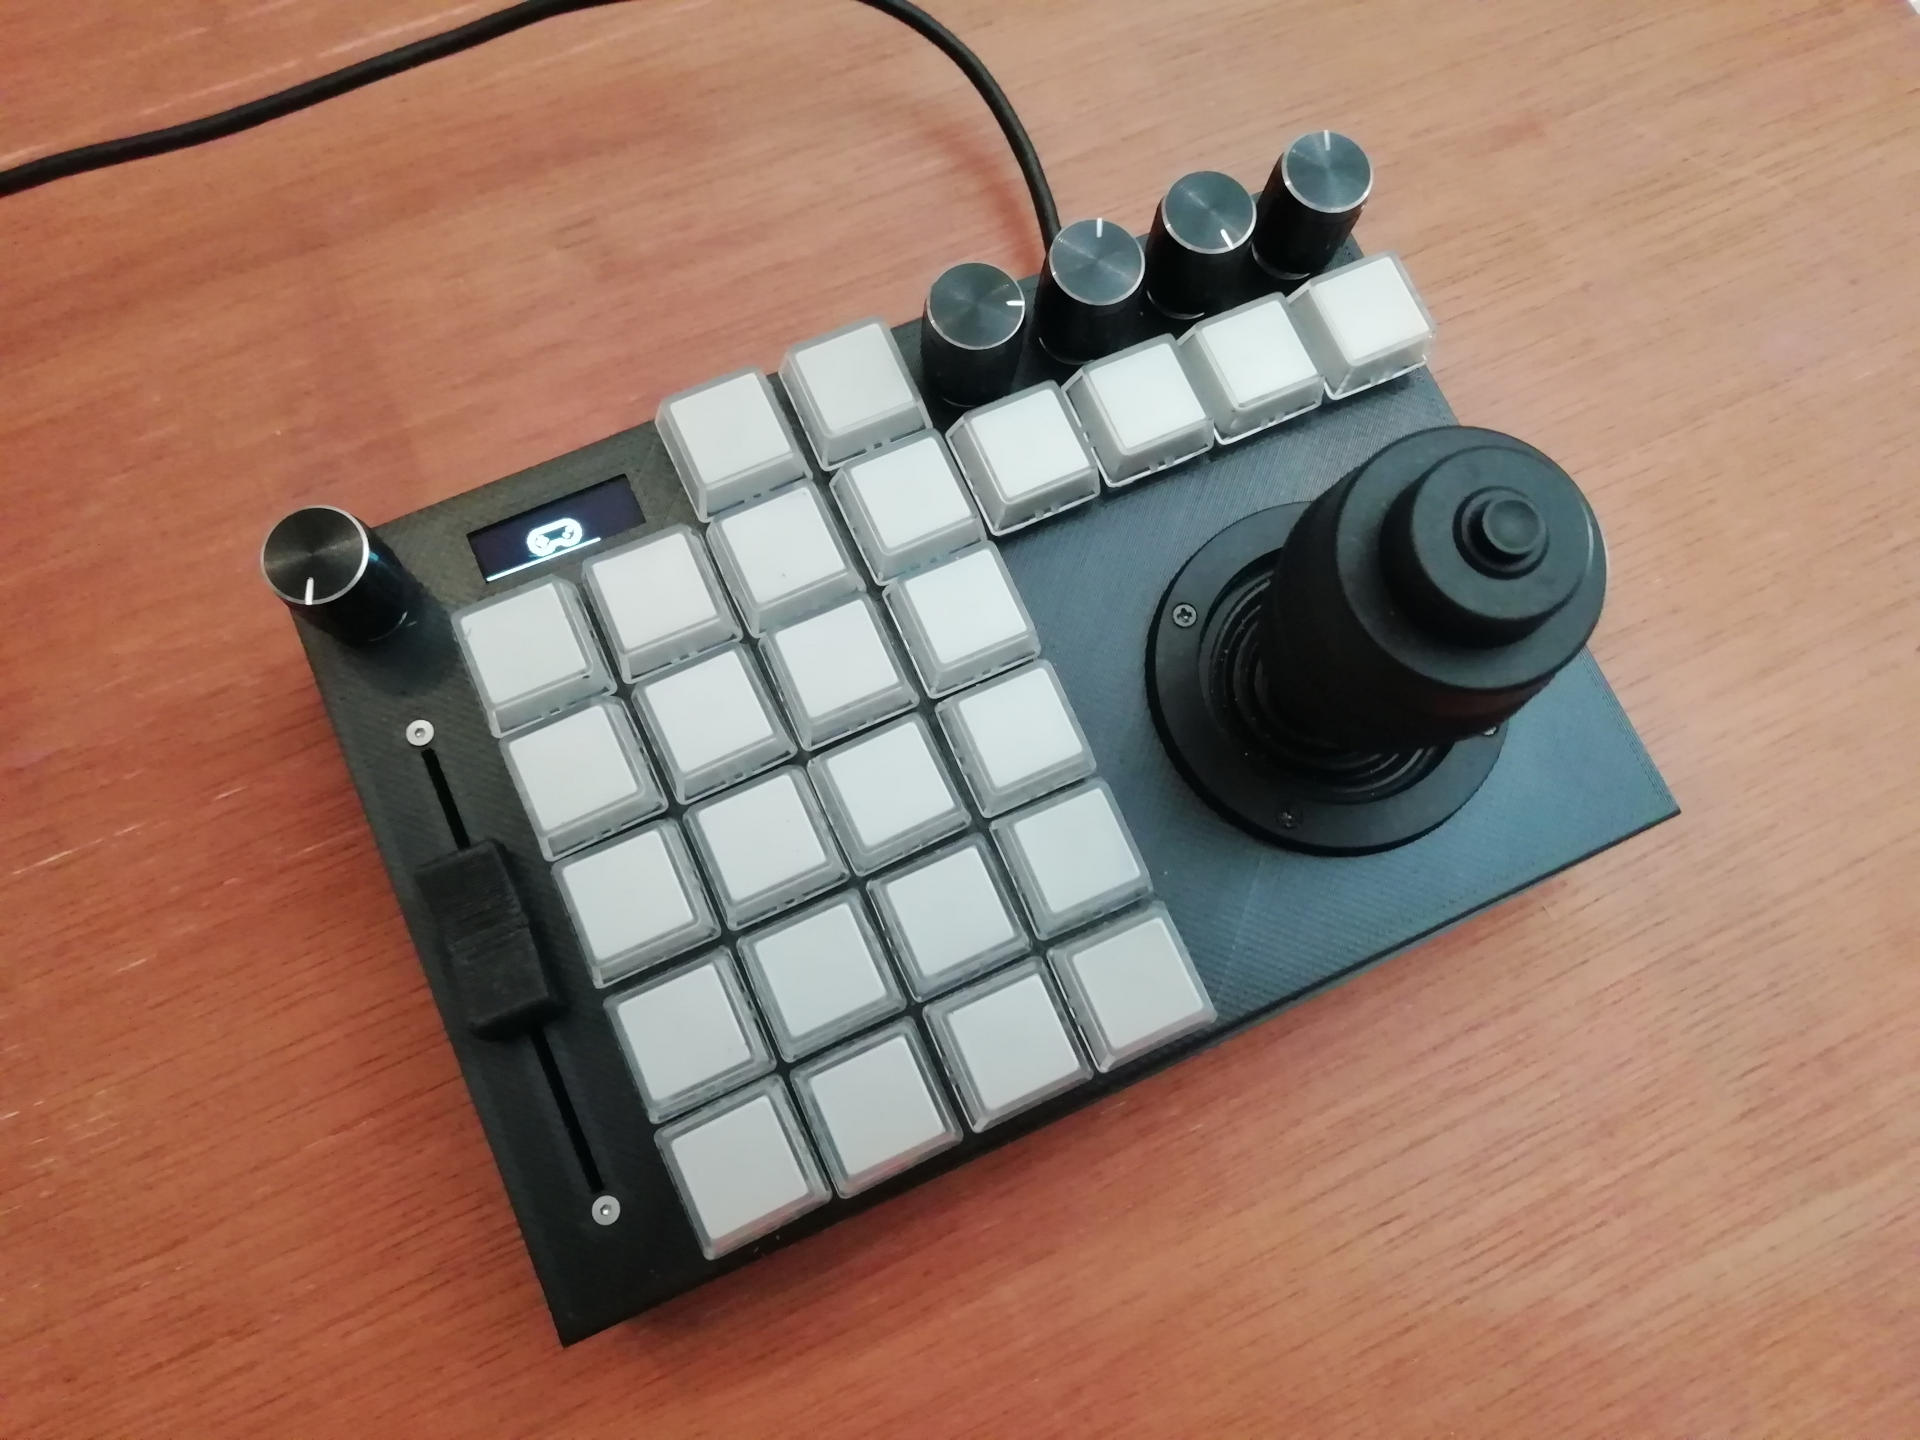
Spoiler
Specs
I want to do this as modules so it can be extended, by plugging in module as you want (and recompile in version 1)
My current plan involves
- Base module for PC interface (Arduino Pro Micro or clone) that presents the input to the Computer via USB with an OLED Display and an rotary encoder for profile switching.
- key-matrix module with up to 64 buttons using an MCP23017 16Bit-IO Extender connected via I2C
- 8x rotary encoder module also using the MCP23017 (click has to be routed to the key matrix or 5x rotary with buttons)
- 16 analog inputs using a cd74hc4067
- theoretically SPI can be added, pins are reserved and currently unused
You can mix and match those things, the MCP23017 has 8 addresses, so you could do 8x64 = 512 keys or add more analog multiplexers
for thousands of analog inputs. (Like an studio audio mixer or something crazy)
All those inputs are mapped to the mouse, keyboard and joystick(s), including macro functions. The profile switching allows for reuse of the
buttons for different things, like in the game mode the buttons act as joystick buttons and the 3D-Joystick maps to the axis. In 3D-Mouse mode, the joystick maps to mouse movements a.s.o. Let's see how much functionality we can squeeze into the little RAM of the Arduino. (Spoiler: a lot)
My goal
For my case I want to build a 3D Mouse with an cheap 3-Axis joystick module (3 analog inputs + 1 digital) plus 2 buttons for 2 extra mouse buttons. I want to retire my Joystick (same Joystick plus maybe a dozen buttons plus a slider for the throttle axis) plus a macro keyboard with 16 buttons in the beginning. And finally for good measure, one rotary encoder module for stuff like volume control or multimedia-functions.
So in total 1 base module, and one of each input modules.
This blog post series will describe the way to the goal involving the electronics, the software and the CAD/3D-Printing part.
The next part deals with the electronics for the modules. Don't worry, it's not complicated and requires minimal previous knowledge.