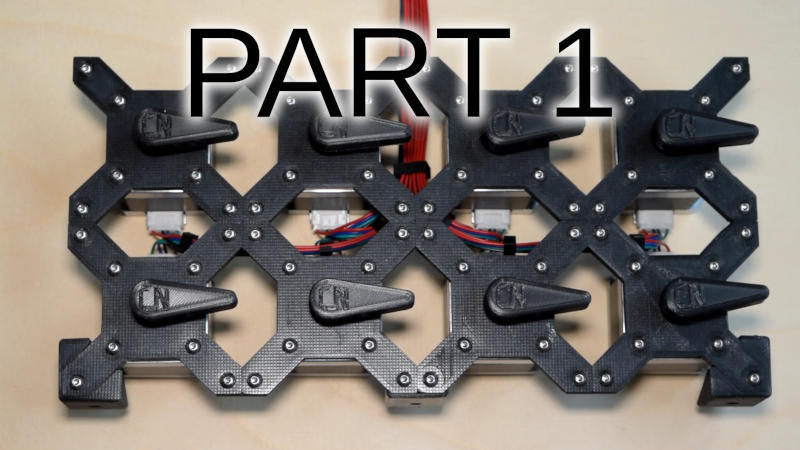
Play "Music" with stepper motors Part 1
This is a description of an more or less stupid, but extremely nerdy side project.
I was working on a motion control project and had a crazy idea, did a short search and found other people that had the same idea:
Play music with a stepper motor.
If you have no idea what above means or your are curious: Here is a quick video of this setup:
I did not find any descriptions, how-tos or anything related to this.
So I made my own version. But this time with documentation and instructions!
How does it work?
The project consists of the hardware plans and the software for the micro controller (I used an Arduino Nano).
This setup receives the instructions over the built-in USB serial interface.
The instructions are simple midi commands consisting of "note on", "note off" and a few mostly ignored control messages.
For every note the corresponding frequency is calculated and one of the stepper motors starts to turn at the right speed
to create that frequency. As soon as the note off command is received the stepper turns off.
The midi commands are created by the computer (see software below).
Hardware overview
What you need for the current version:
- A computer running Linux with a free USB port
- An Arduino (Uno, Nano or similar, original or clone)
- Up to 8 stepper drivers A4988 or compatible
- Up to 8 stepper motors (any size works, no real torque required)
- A power supply for the steppers, I used a variable supply, 12V-36V a few Watt is fine.
- A breadboard with a few wires
- Insanity level of 11 (from 1 lowest to 10 max)
Software overview
You need a software to create a virtual midi port that then sends the commands to the Arduino. I used ttymidi latest git version.
I'm sure similar software exists for Windows or Mac.
Next, you need a midi player that send the right note on/off commands at the right time. I used rosegarden, probably a bit overkill,
but it works fine.
And finally, you need the songs themself in a midi format. I'm sure you'll find them on your own.
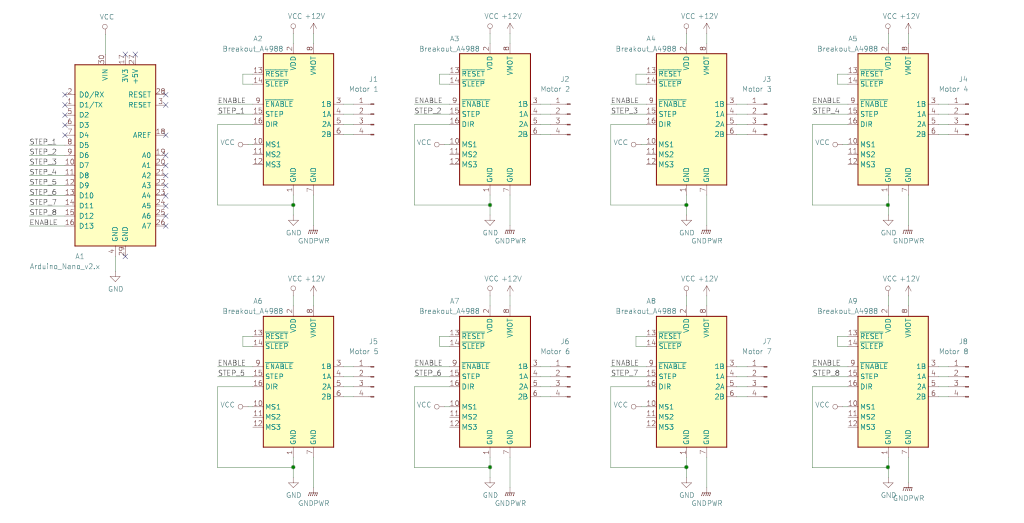
Schematics and board
The schematics is simple, just 8 times the drivers:
The breadboard is a bit more complex: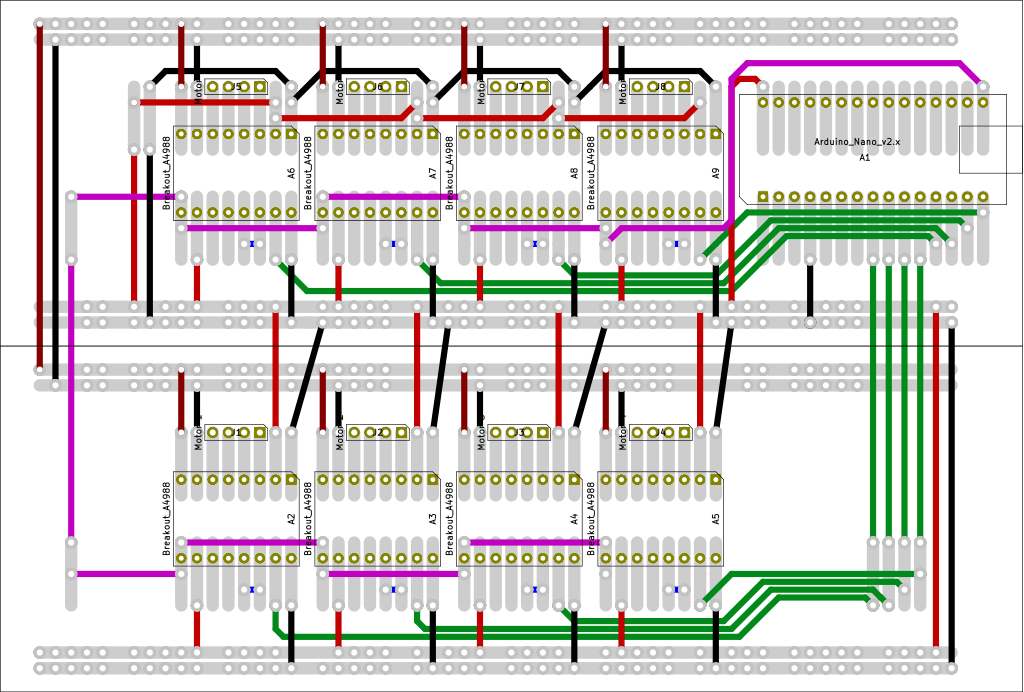
Only the used connections on the 2 breadboards are shown.
black wires = ground (motor and 5V)
red wire = plus 5V (from USB via Arduino)
darker red wire = +12V for steppers (connect to top power bar)
green wire = control signal for the steppers
pink wires = enable the stepper drivers
blue wires = enable the driver modules
WARNING: do not mix the power lanes, this will kill at least the Arduino, maybe the USB controller in your computer as well. The top bars on each
breadboard is 12V only, the lower ones the 5V.
Software
A full description of the software including source code will be released with the Play "Music" with stepper motors part 2.
Digitale Signaturen des Artikels
Was sind die digitalen Signaturen und wie prüfe ich die?Inhalts-Signatur:
a66d51f448c2c22557b848cc6c3e762fMGQCMCUdyy9ViAMYEUj8KEkSHTBktr/nWw3im0P+7LNLQBOLyxaBa3MjoeicSdgi3JVsKgIwZ3WyOhhLoNztQmnzK1rQiIo1HfkSjmIGkMwigvtyywghkwzr7Is9R3IeIkwz5RV6
Content Nation Signatur
MGQCMC3V/1TRDkFa7HrNUuFe/rY+NxRZtTxn93dwGnwrUpASlHDSRLwsA5gv4lPMALY4SgIwEAWY1g4tDP4ry2FVusdDhWP6kiFRZPeNwwZNb4RFYHnvV1lL9HPxeGXNc5t/7Ft7
Mehr Signatur-Informationen
Inhalts-Signatur:
Profil public key (a66d51f448c2c22557b848cc6c3e762f)