Electronics to trigger Cameras, Flash and other things
What is it good for?
Take a look at the water drop video. Or one still image of it:
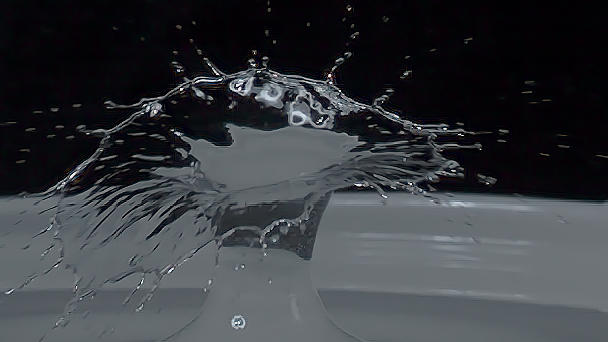
Here, the electronics is used to control the precise timing of the water drops.
And by precise, it means by 1 ms adjustment, the timing itself is even more precise.
How does is work?
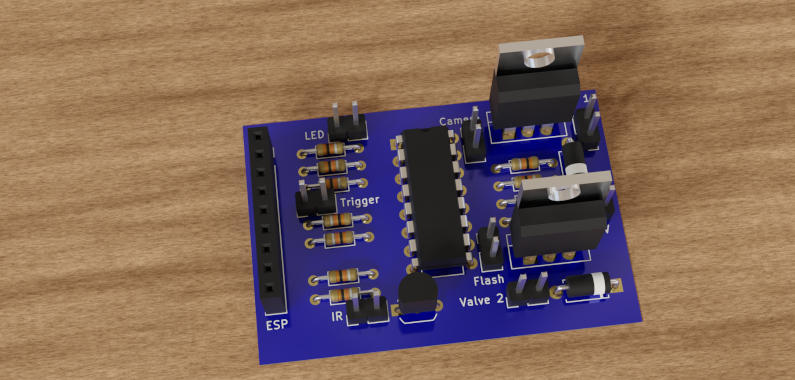
The core is an ESP8266 module of more or less any kind. I'm using the popular NodeMCU module. This can be directly plugged into above board.
The ESP8266 connects to an existing WiFi network or can create one.
If you restart the module, the last configured network will be used again.
If you flash the module and upload the data as a LitteFS image (both can be done within the Arduino suite), you get a web interface to control all outputs and inputs. The default setup matches the layout of the board.
Source code and electronics can be found at The Camera Trigger repository
The electronics
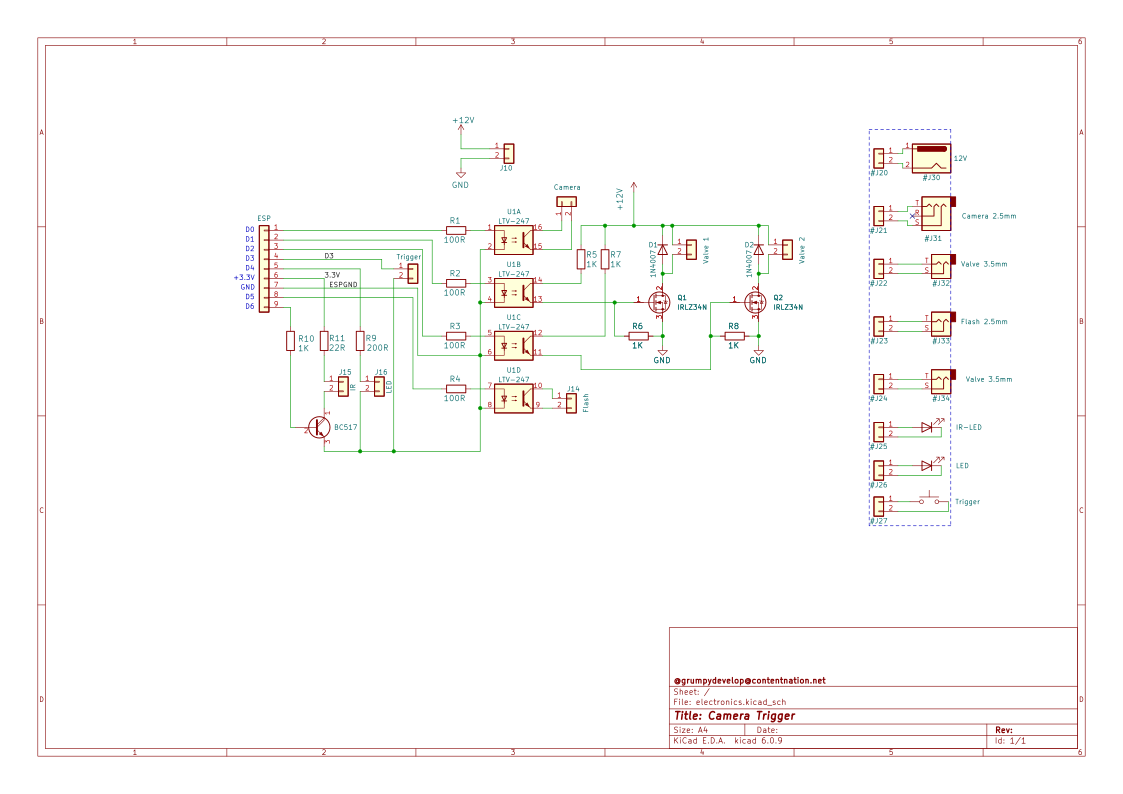
As mentioned, the ESP8266 acts as controller, its output pins D0, D1, D2, D5 are all connected to an LTV-247 opto coupler.
On the output side of the opto coupler are 2 mosfets to control valves (or any other powered device) by switching the negative connection of the connector to ground. The mosfet is powered by the positive supply rail of the power stage.
The other two opto coupler are designed to trigger a camera and a flash. Those usually need a (electronic) switch contact to be closed to trigger. This is done by the opt coupler.
Also include is a general purpose LED circuit as well as higher powered LED driver for an infrared LED. This can be used to trigger a camera via the built in remote receiver. It is tested with a Nikon camera, but should work with Canon and Sony as well. But I can't test it.
The board is designed to be manually soldered onto a perfboard with 2.54mm (0.1 inch) grid.
The software
The core feature of the ESP chips is their integrated WiFi functionality. If you start it for the first time and you did not set any WiFi network to connect to, it will create one. The default SSID is "cameratrigger", password is "cameratrigger". Just open any WiFi client (laptop or phone) and connect to the network. It will show that you need to log in to use the network. The login page is the website you control everything.
If you want to, you can change the settings to connect to your home network, it supports scanning for networks.
Once connected or if acting as an own access point, the onboard LED will "blink" it's IP address.
It starts with a long (1s) light. After this there are short flashings for each digit. A dot is only a short flash, the end is marked by multiple fast flashes. Let's say you got the IP 192.168.2.34. It will start with a long light, one short blink, a very short a delay, 9 blinks, a delay, 2 blinks, a very short blink for the dot a.s.o. until you reach the end with multiple fast flashes.
The interface itself should be straight forward, here is a screen shot with the setup used to create the drop-on-drop from above:
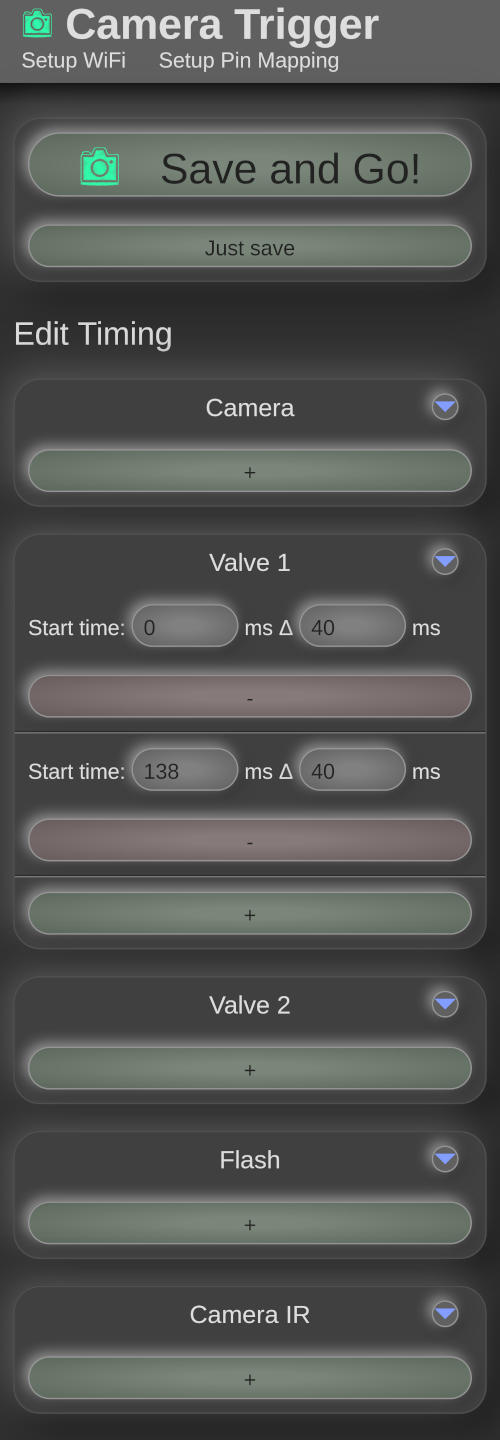
In the "Setup Pin Mapping" view you can adjust the used pins, if needed. One example is to switch the IR camera mode from Nikon to Canon.
The physical setup
Let's start with the valve setup. I'm using an ordinary 12V inline valve:
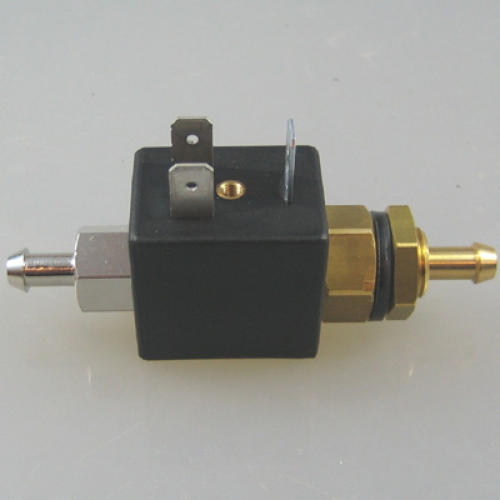 The 2 parallel connections are for power. I mounted the brass side pointing up and just added a few cm of PVC tube as a reservoir. You don't need much water, you are just releasing drops. This is connected to the valve1 pins on the board.
If you happen to have a high speed camera, just set up to point at the right direction, place your lights and off you go.
If you don't have access to a high-speed camera, you want to let the system trigger your camera and flash. The trick here is that you use a dark room, open the camera for a long time (a second or two) and you freeze the motion by using a flash. The flash freezes the motion because it only lights up for something like a 1/10000 of a second. This depends on make and model and the power. The more power, the longer brightness.
Additionally to the timing of the drops you need to add the camera shutter. You manually set the time to 2s, manually focus the camera and enable remote IR triggering or use a cable connected to the camera pins of the electronics. If connected to the electronics and the shutter does not trigger, reverse the cables, then it should work.
Similar for the flash.
So in final the timing is like this (exact times need to be found when experimenting):
Time 0: trigger the camera (camera opens for 2 s after this)
Time 100: (trial an error), open valve 1 for 40ms
Time 138: open valve 1 again for 40ms
Time X: (depending on height above water level) fire flash
The flash firing moment need to be experimented with, it depends on the delay between trigger and actually light output as well as the time the drop needs to fall down. Also depending on the water (or other liquids you use) you might need to adjust the opening time or the delay to get the desired effect.
As a bonus, you could use colored water and 2 valves or with more electronics 4, 5... Like a blue and red drop into clear or white water.
You can use the plans and software for free, but it would be cool to tag me (@grumpydevelop@contentnation.net in Fediverse) or send a link over.
Also if you own a Canon or Sony camera, please give me positive feedback or bugfixes if it does not work and you have the skills to measure the timings. Those IR signals for those cameras are only from online sources.